
Connie Vines' Fragrance for Love Series
Sunday, January 27, 2013


Wednesday, January 02, 2013
3 Tips from Paris to Look Fabulous
Being stylish doesn't mean spending hours getting ready. "It's about paying attention to a few details," says Jennifer Scott, lifestyle blogger at the Daily Connoisseur.
Ladies, try Scott's real-world tricks to look perfectly polished.
1. Create a core wardrobe. "Clear out the clutter in your closet and donate clothes that do not suit you," says Scott. "You'll be able to orchestrate several polished outfits that you can pick at a moment's notice." This wardrobe may include such items as a pair of shinny jeans, wool pants, blazer, pencil skirt, fitted cardigan, silk blouse, ballet flats and trench coat.
2. Organize your accessories. "Spend one afternoon playing with the accessories in your wardrobe to find out which scarves work best with which blouses, and do the same with the jewelry," says Scott. Knowing which accessories work best with various outfits makes it easier to finish your look next time you're in a hurry.
3. Perfect a simple hairstyle. "If you pull you hair back into a ponytail," Scott says, "try this embellishment. Hide the elastic band by wrapping a few strands of hair around it and securing with a bobby pin for a thoughtful touch." For short hair, try an off-center part; smooth flyaway hairs with gel. It looks sleek and neat dressed up or dressed down."
Merci!
Ladies, try Scott's real-world tricks to look perfectly polished.
1. Create a core wardrobe. "Clear out the clutter in your closet and donate clothes that do not suit you," says Scott. "You'll be able to orchestrate several polished outfits that you can pick at a moment's notice." This wardrobe may include such items as a pair of shinny jeans, wool pants, blazer, pencil skirt, fitted cardigan, silk blouse, ballet flats and trench coat.
2. Organize your accessories. "Spend one afternoon playing with the accessories in your wardrobe to find out which scarves work best with which blouses, and do the same with the jewelry," says Scott. Knowing which accessories work best with various outfits makes it easier to finish your look next time you're in a hurry.
3. Perfect a simple hairstyle. "If you pull you hair back into a ponytail," Scott says, "try this embellishment. Hide the elastic band by wrapping a few strands of hair around it and securing with a bobby pin for a thoughtful touch." For short hair, try an off-center part; smooth flyaway hairs with gel. It looks sleek and neat dressed up or dressed down."
Merci!
Tuesday, December 25, 2012
Easy Egg Nog Pound Cake
1 package of yellow cake mix (I prefer Duncan Hines)
1 4-serving size package of vanilla pudding (sugar free works too)
3/4 cup Knudsen low-fat Egg Nog (again, my preference)
3/4 cup vegetable oil
4 eggs
1/2 teaspoon ground nutmeg
Powdered sugar
1. Preheat oven to 350 degrees.
2. In a large bowl, combine cake mix, pudding mix, egg nog and oil beat on low speed until moistened. Add eggs and nutmeg; beat in a medium-high speed 4 minutes. Pour into a greased (prefer butter flavored crisco) and floured 10-inched fluted or tube pan.
3. Bake 40 - 45 minutes until toothpick inserted near center comes out clean. Cool 10 minutes, remove from pan. Cool completely. Sprinkled with sifted powdered sugar. Store left overs covered at room temperature.
Makes one (10-inch) cake
Pre Time: 10 minutes
Bake Time: 40 to 45 minutes

1 4-serving size package of vanilla pudding (sugar free works too)
3/4 cup Knudsen low-fat Egg Nog (again, my preference)
3/4 cup vegetable oil
4 eggs
1/2 teaspoon ground nutmeg
Powdered sugar
1. Preheat oven to 350 degrees.
2. In a large bowl, combine cake mix, pudding mix, egg nog and oil beat on low speed until moistened. Add eggs and nutmeg; beat in a medium-high speed 4 minutes. Pour into a greased (prefer butter flavored crisco) and floured 10-inched fluted or tube pan.
3. Bake 40 - 45 minutes until toothpick inserted near center comes out clean. Cool 10 minutes, remove from pan. Cool completely. Sprinkled with sifted powdered sugar. Store left overs covered at room temperature.
Makes one (10-inch) cake
Pre Time: 10 minutes
Bake Time: 40 to 45 minutes
Saturday, November 17, 2012
Latest Gadget--AKA Darth Vader's Death Star
According to Wikipedia: The Death Star is a fictional moon-sized spacestation and superweapon appearing in the Star Wars movies and expanded universe. It is capable of destroying a planet with a single destructive energy beam.
The Pressure Cooker is a sealed vessel that does not permit air or liquids to escape below a pre-set pressure. Pressure cooking allows food to be cooked with greater humidity and higher temperatures than possible with conventional boiling or steaming methods. Excess heat causes boiling water to vaporize into steam. In a sealed pressure cooker, the boiling point of water increases as the pressure rises.
Umm. . Sounds like a mini Death Star--capable of destroying my kitchen and, perhaps, even vaporizing ME!
As my family, and a select number of my friends know, I have attempted to purchase a pressure cooker (in one form or another) for the past five years. I've researched, examined, held, and even got as far as the check stand at Macy's--only to change my mind.
I spied an electric pressure cooker last week and ordered it online. I unpacked it yesterday and yanked my rump roast from the fridge this afternoon. After memorizing the directions, I got busy. I chopped an onion, bell pepper, garlic cloves, added a cup-and-a-half of beef broth, Italian seasoning, bay leave and five Italian peppers. Everything went into the inner pot. A little over an hour later, I had prepared the best roast I had ever tasted!
Now I see my pressure cooker as more of a cute little R2D2 (Resourceful and spunky droid). His bravery, coupled with his many gadgets, played large roles in saving the galaxy time and time again, than Darth Vader's weapon.
I'm still cautious when operating pressure cooker, as I should be, but I'm confident this device will become my go-to gadget after I get home from work.
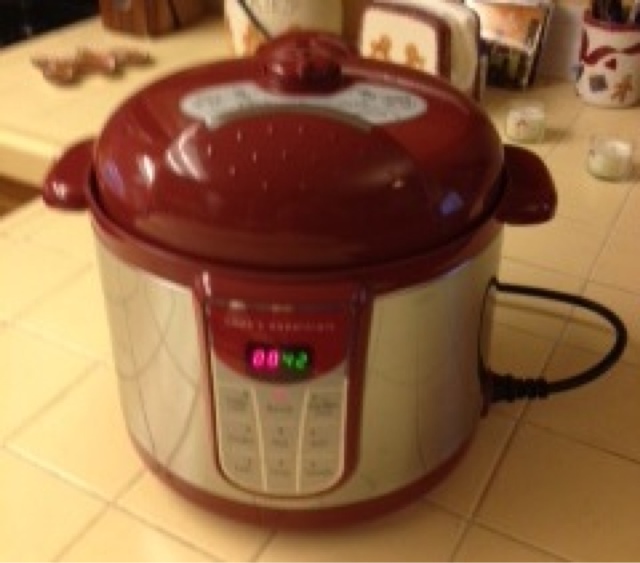

The Pressure Cooker is a sealed vessel that does not permit air or liquids to escape below a pre-set pressure. Pressure cooking allows food to be cooked with greater humidity and higher temperatures than possible with conventional boiling or steaming methods. Excess heat causes boiling water to vaporize into steam. In a sealed pressure cooker, the boiling point of water increases as the pressure rises.
Umm. . Sounds like a mini Death Star--capable of destroying my kitchen and, perhaps, even vaporizing ME!
As my family, and a select number of my friends know, I have attempted to purchase a pressure cooker (in one form or another) for the past five years. I've researched, examined, held, and even got as far as the check stand at Macy's--only to change my mind.
I spied an electric pressure cooker last week and ordered it online. I unpacked it yesterday and yanked my rump roast from the fridge this afternoon. After memorizing the directions, I got busy. I chopped an onion, bell pepper, garlic cloves, added a cup-and-a-half of beef broth, Italian seasoning, bay leave and five Italian peppers. Everything went into the inner pot. A little over an hour later, I had prepared the best roast I had ever tasted!
Now I see my pressure cooker as more of a cute little R2D2 (Resourceful and spunky droid). His bravery, coupled with his many gadgets, played large roles in saving the galaxy time and time again, than Darth Vader's weapon.
I'm still cautious when operating pressure cooker, as I should be, but I'm confident this device will become my go-to gadget after I get home from work.
Friday, November 02, 2012
Overcoming Writer's Block
So, here I am, mind utterly blank, staring at a completely blank computer screen, and hoping some ethereal entity will sprinkle pixie dust in my hair or smack me with the business-end of a magic wand to get me writing.
Ummm. Still no Muse?
What was that Philip Pullman quote?
“All writing is difficult. The most you can hope for is a day when it goes reasonably easily. Plumbers don’t get plumber’s block, and doctors don’t get doctor’s block; why should writers be the only profession that gives a special name to the difficulty of working, and then expects sympathy for it?”
Why indeed?
In my case there’s an awful temptation to just keep on researching. Another trip to the library, a new techie toy, writing program, or workshop? A long drive down Route 66 to make sure my sensory details are accurate. Soon it's information overload.
However, today it's time to step back, reach for a strong cup of coffee, and toss my plotting notebook, with my almost-legible scribbles filling its pages, onto my desk. I don't want sympathy. I want a killer opening hook!
Experience has taught me that even when I haven't got an idea, I must start the story anyway. I can always press the delete button later. Perhaps by the third page I will have a workable idea.
If not, I'll save it to a file labeled backstory, and begin again. I'll rework my plot twists and my dialogue until I not only have a killer opening hook, but a darn good story!
No one said my job was easy, but it is sooo worth it!

Ummm. Still no Muse?
What was that Philip Pullman quote?
“All writing is difficult. The most you can hope for is a day when it goes reasonably easily. Plumbers don’t get plumber’s block, and doctors don’t get doctor’s block; why should writers be the only profession that gives a special name to the difficulty of working, and then expects sympathy for it?”
Why indeed?
In my case there’s an awful temptation to just keep on researching. Another trip to the library, a new techie toy, writing program, or workshop? A long drive down Route 66 to make sure my sensory details are accurate. Soon it's information overload.
However, today it's time to step back, reach for a strong cup of coffee, and toss my plotting notebook, with my almost-legible scribbles filling its pages, onto my desk. I don't want sympathy. I want a killer opening hook!
Experience has taught me that even when I haven't got an idea, I must start the story anyway. I can always press the delete button later. Perhaps by the third page I will have a workable idea.
If not, I'll save it to a file labeled backstory, and begin again. I'll rework my plot twists and my dialogue until I not only have a killer opening hook, but a darn good story!
No one said my job was easy, but it is sooo worth it!
Sunday, October 28, 2012
Pinterest is a Virtual Pinboard
During the past three months, along with revising my latest novel, updating my website, I am venturing into the cyber-pinning world. I have been assured this process is painless (no old school push pins and letting of blood involved).
It took me four days to get my Pinterest app to stick to my iPad and iPhone bookmark bar. Setting up my individual boards was a snap. . .until I realized a title was required for each board. Title! I am a novelist and I know how important a title is. I am also aware I resembled a panic-stricken, wild-eyed animal trembling in a corner for several moments before I got a grip on myself. Sort of. Three sleepless nights later, I added titles to my boards.
Let the pinning begin!
Since I am on deadline and must still feed the family, I'm posting my fast and family pleasing Root Beer Float Cake.
1 package 2-layer yellow cake mix
Root Beer
1-1/2 teaspoon vanilla
1 teaspoon lemon zest
Root Beer Icing
Grease 9x13 baking pan. Preheat oven to 350 degrees F (325 degrees glass pan). Prepare cake mix according to package directions, except substitute root beer for liquid and add lemon zest and vanilla. Spread batter evenly. Bake according to package directions. Cool in pan on a wire rack for 10 minutes. Carefully invert cake onto a wire rack; remove pan. Cool completely. Invert again onto another wire rack.
Using a serrated knife, cut top of cake to make it level. Trim edges of cake. Discard trimmed pieces. Cut cake in half lengthwise into two 4.5 x 13-inch rectangles. Place one cake rectangle on a serving platter. Spread with half of the Root Beer Icing. Top with second cake rectangle. Spread top with remaining icing. Serves 15.
Root Beer Icing
In a medium bowl beat half a cup of butter with an electric mixer on medium to high speed until smooth. Gradually add 1 cup powdered sugar, beating well. Slowly beat in 3 tablespoons of root beer and 1 taspoon of vanilla. Gradually beat in 2 cups of powdered sugar. If necessary, beat in a little more root beer or powdered sugar to make the icing spreading consistency.

It took me four days to get my Pinterest app to stick to my iPad and iPhone bookmark bar. Setting up my individual boards was a snap. . .until I realized a title was required for each board. Title! I am a novelist and I know how important a title is. I am also aware I resembled a panic-stricken, wild-eyed animal trembling in a corner for several moments before I got a grip on myself. Sort of. Three sleepless nights later, I added titles to my boards.
Let the pinning begin!
Since I am on deadline and must still feed the family, I'm posting my fast and family pleasing Root Beer Float Cake.
1 package 2-layer yellow cake mix
Root Beer
1-1/2 teaspoon vanilla
1 teaspoon lemon zest
Root Beer Icing
Grease 9x13 baking pan. Preheat oven to 350 degrees F (325 degrees glass pan). Prepare cake mix according to package directions, except substitute root beer for liquid and add lemon zest and vanilla. Spread batter evenly. Bake according to package directions. Cool in pan on a wire rack for 10 minutes. Carefully invert cake onto a wire rack; remove pan. Cool completely. Invert again onto another wire rack.
Using a serrated knife, cut top of cake to make it level. Trim edges of cake. Discard trimmed pieces. Cut cake in half lengthwise into two 4.5 x 13-inch rectangles. Place one cake rectangle on a serving platter. Spread with half of the Root Beer Icing. Top with second cake rectangle. Spread top with remaining icing. Serves 15.
Root Beer Icing
In a medium bowl beat half a cup of butter with an electric mixer on medium to high speed until smooth. Gradually add 1 cup powdered sugar, beating well. Slowly beat in 3 tablespoons of root beer and 1 taspoon of vanilla. Gradually beat in 2 cups of powdered sugar. If necessary, beat in a little more root beer or powdered sugar to make the icing spreading consistency.
Wednesday, September 19, 2012
Commas Save Lives!
There is nothing much to punctuating a sentence really, beyond a little comma sense. Yeah, yeah, I know what you're thinking--what's a misplaced, or forgotten comma or two? Like I said, commas can save lives!
You don't believe it? Take a look.
Jessica claimed Frankenstein planned the murder.
Without comma, the angry villagers charge up the hill, torches blazing. But add a pair of commas, and Jessica becomes the suspect.
Cora, claimed Frankenstein, planned the murder.
Here's another example (remember your are at the Zombie Nite Cafe):
Let's eat Grandpa!
Let's eat, Grandpa!
In the first sentence, the Zombies are planning to eat Grandpa; the second, inviting him to dine with them.
Don't take commas for granted. Commas can save lives, or at the very least, avoid a misunderstanding.
You don't believe it? Take a look.
Jessica claimed Frankenstein planned the murder.
Without comma, the angry villagers charge up the hill, torches blazing. But add a pair of commas, and Jessica becomes the suspect.
Cora, claimed Frankenstein, planned the murder.
Here's another example (remember your are at the Zombie Nite Cafe):
Let's eat Grandpa!
Let's eat, Grandpa!
In the first sentence, the Zombies are planning to eat Grandpa; the second, inviting him to dine with them.
Don't take commas for granted. Commas can save lives, or at the very least, avoid a misunderstanding.
Subscribe to:
Posts (Atom)